First Flare3D project
March 25, 2013Where I work in Brando we got an opportunity recently to work on an interesting project.
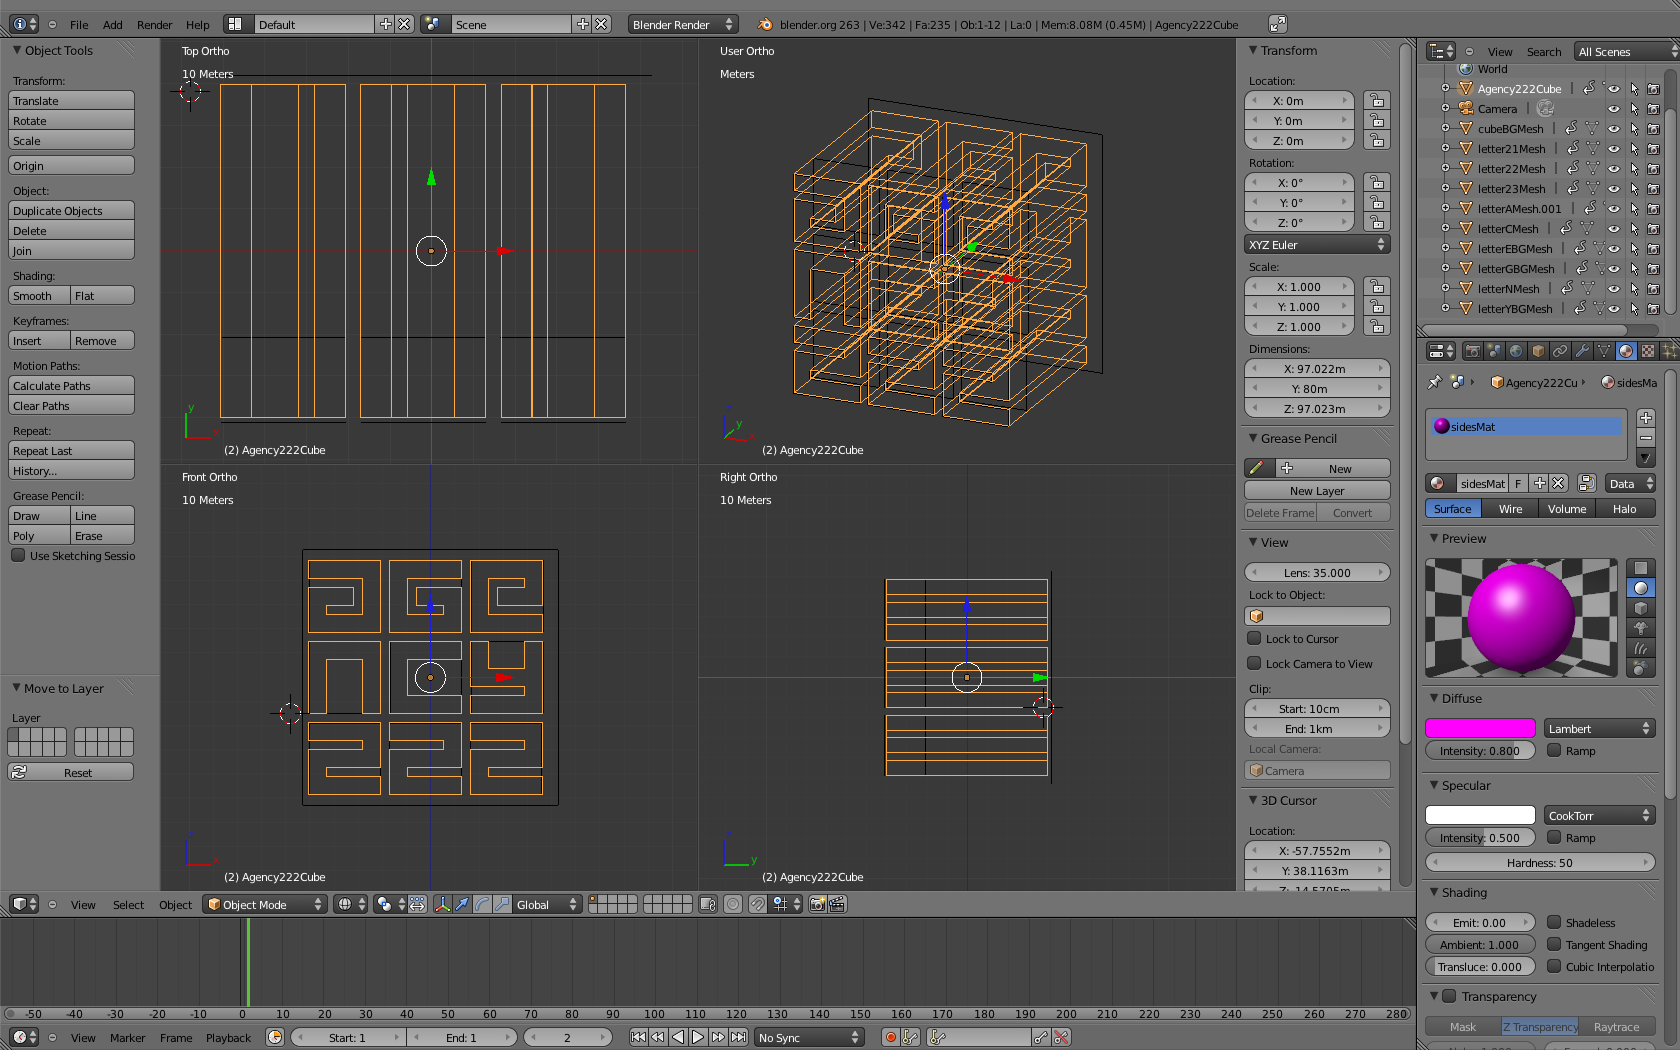
The project was a website for Qatar based Agency 222. They wanted the site to have as it’s central point a 3D cube. While evaluating the project, it became apparent that the web has reached an interesting point in it’s relationship with 3D.
3D in the Browser
Since the days when Director was one of the main web plugins for advanced multi-media projects there has been something of a dearth in 3D capable plugins for the web. Now, with recent advancements from Adobe and HTML5 (particularly Google Chrome) there is a lot of choice now in this area. Adobe have integrated pseudo-3D controls since CS4. But with the release of the Stage3D in Flash Player 11 the possibilites were blown wide open with hardware acceleration via the GPU now on offer. At the same time, the Google Chrome team have been working hard on exposing hardware acceleration via the GPU in the browser natively, accessed via Javascript. This is called WebGL.
3D Engine
In order for the layman to use any of these technologies, an API of some description is required. When we got the brief, the following technologies were available:
- Away3D (with no Stage3D support)
- Flare3D
- Unity3D (requires separate plugin)
- three.js (Only worked on Chrome)
- Alternativa3D
It was decided to go with the Flare3D engine, as it had the most reach in terms of browser support.
Flare3D
The purpose of this article is to share some of the insights we gained from the project. Flare3D was a nice engine to work with, but 3D is exponentially more difficult to work with in terms of maths than 2D. Flare3D does what it can to take these headaches away, but they are always there when you try to do something that has not already been written for you. Some of the learnings were:
Get a proper 3D person who knows 3D Studio Max. In our project we used Blender to make the meshes. There can be little doubt that the .dae (Collada) format is the poor man in terms of support from the Flare3D people. We had to take exported Collada files and bring them into the Flare3D studio and then re-export them as f3d files for good results.

Browse the code examples on the Flare3D wiki. They are invaluable and are going to be one of your chief ways of discovering new techniques. Actual API documentation can be… patchy Memory management is vitally important. Beware of Vector3D objects, don’t create any unless you really have to. Most functions have an optional last parameter, which is a pre-created object. If passed in, this object will be used instead of instantiating a new one. It is highly recommended to use an object pool for this purpose:
public function getScreenRect(mesh:Mesh3D, out:Rectangle=null):Rectangle {
    if(!out) {
        out = new Rectangle();
    }
    return out;
}
UV Coords exported from Blender had constant issues for me. Most were manifested as graphical glitches on the edge. To fix these I implemented the following function and ‘fixed’ the UV mappings, which might have values like 0.02 or something similar. This might have been fixed since
/**
  * Blender has issues with UV coords, which for Flare3D should be
  * between 0 and 1, not -1 and 1. This function corrects this
  *
  * @param mesh The mesh to perform the operation on. Must be a plane
  * @param rot The rotation to use, there are only 4
  *
  */
  public static function correctBlenderUVs(mesh:Mesh3D, rot:int):void {

    var s:Surface3D = mesh.surfaces\[0\];
    var uv:int = s.offset\[Surface3D.UV0\];

    var length:int = s.vertexVector.length;
    var sizePerVertex:int = s.sizePerVertex;

    switch(rot) {
        case 1:
            s.vertexVector[0 + uv] = 0;
            s.vertexVector[0 + uv + 1] = 0;
            s.vertexVector[8 + uv] = 0;
            s.vertexVector[8 + uv + 1] = 1;
            s.vertexVector[16 + uv] = 1;
            s.vertexVector[16 + uv + 1] = 1;
            s.vertexVector[24 + uv] = 1;
            s.vertexVector[24 + uv + 1] = 0;
            break;
        case 2:
            s.vertexVector[0 + uv] = 0;
            s.vertexVector[0 + uv + 1] = 1;
            s.vertexVector[8 + uv] = 1;
            s.vertexVector[8 + uv + 1] = 1;
            s.vertexVector[16 + uv] = 1;
            s.vertexVector[16 + uv + 1] = 0;
            s.vertexVector[24 + uv] = 0;
            s.vertexVector[24 + uv + 1] = 0;
            break;
        case 3:
            s.vertexVector[0 + uv] = 1;
            s.vertexVector[0 + uv + 1] = 1;
            s.vertexVector[8 + uv] = 1;
            s.vertexVector[8 + uv + 1] = 0;
            s.vertexVector[16 + uv] = 0;
            s.vertexVector[16 + uv + 1] = 0;
            s.vertexVector[24 + uv] = 0;
            s.vertexVector[24 + uv + 1] = 1;
            break;
        case 4:
            s.vertexVector[0 + uv] = 1;
            s.vertexVector[0 + uv + 1] = 0;
            s.vertexVector[8 + uv] = 0;
            s.vertexVector[8 + uv + 1] = 0;
            s.vertexVector[16 + uv] = 0;
            s.vertexVector[16 + uv + 1] = 1;
            s.vertexVector[24 + uv] = 1;
            s.vertexVector[24 + uv + 1] = 1;
            break;
    }
}
If possible, have a fixed size viewport. Again, this might be down to my deficiencies, but I found when resizing the viewport, some calculations became very difficult. Additionally, 3D objects in Flare3D don’t really have ‘resize’ functions such as width and height. Once resized I found I actually needed to go in and editing the vertex data via code and then get the vertex buffers to flush. This has an impact on performance (that’s why the buffers exist).
Stay away from Flex. Flex gobbles up events and then doesn’t play nice with anything else. It will take a mouse event and not propagate it. This cost us a virtual rewrite to an AS3 project.
Create your textures once. Load your images in once, create the texture objects, then simply refer to them from one place. This again will help performance. Creating textures is costly in terms of performance. We ended up creating a Texture singleton for the entire application. If your class wants a model… it has to go there.
That’s all I have for now, I hope this is helpful for someone.